Connecting your form to Agile CRM
By connecting your form to Agile CRM, you can send any submissions you receive straight to Agile CRM as a Contact.
This article will explain how to connect your form to Agile CRM.
Firstly, on the Connect page of the form builder, choose Agile CRM from the list and click Connect.

If you haven't added an Agile CRM account before, a form will appear (if you have already added an account, a list of your Agile CRM accounts will display instead).
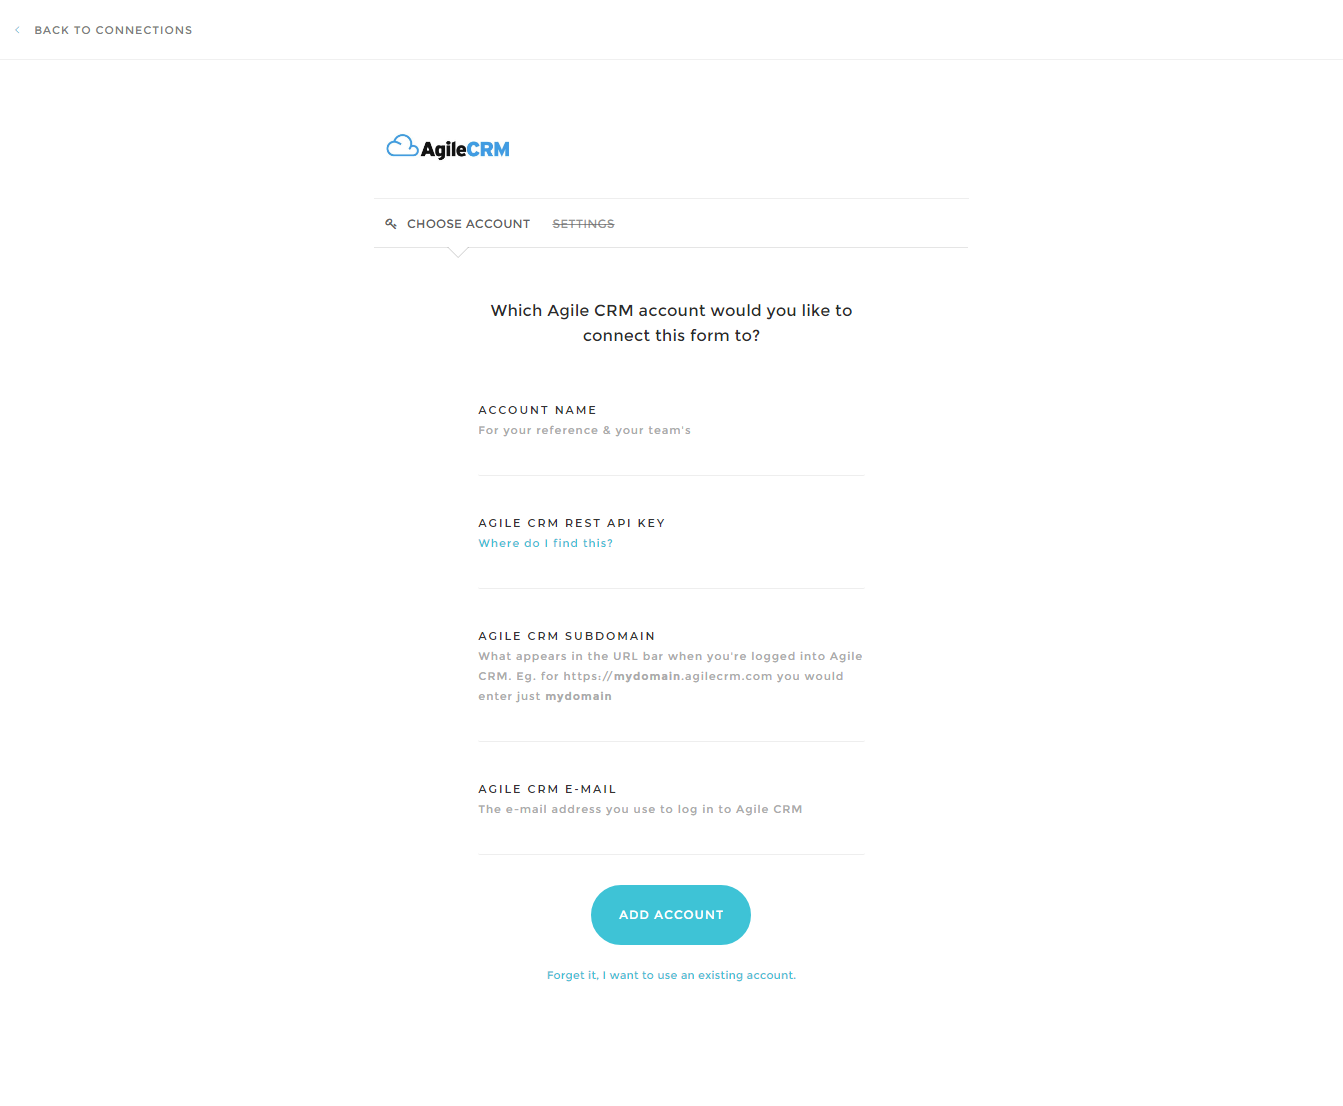
The form has a couple of fields:
- Account Name - This is just for your reference so you can separate one account from another.
- Agile CRM Rest API Key - Your Agile CRM REST API key
- Agile CRM Subdomain - What appears in the URL bar when you're logged into Agile CRM. EG for https://mydomain.agilecrm.com you would enter just mydomain
- Agile CRM E-mail - the e-mail address you use to log into Agile CRM
Once you are ready, click Add Account. You will be taken to the Settings page.
The Settings page is where you can choose how Agile CRM will handle your form submissions.
The options are:
- Tags for this Contact - comma separated tags eg: tag 1, tag 2, tag 3, etc
Beneath these options you will find the field mappings:
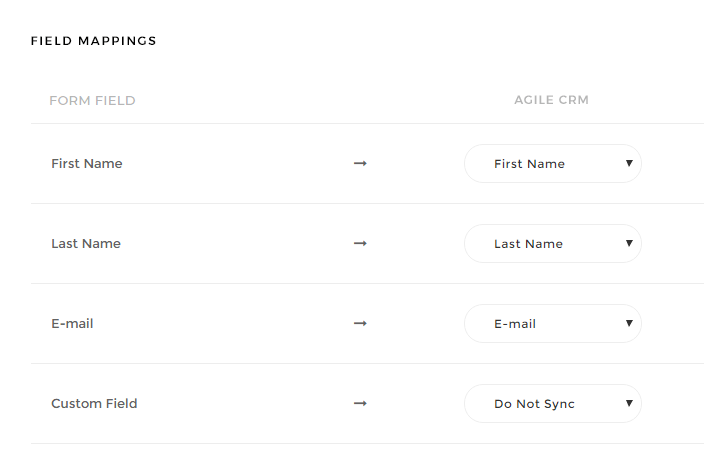
On the left is the field as it is in AgileForms, in the dropdown menu is the field you want to link to in Agile CRM. AgileForms will try to map certain fields automatically, but you will need to check that these are correct.
To map a field from your form to a custom field in your Agile CRM account, choose add custom field from the dropdown menu and a form will appear to enter the name of your custom field.
When you are done click Save
That's it! Your form is now connected to Agile CRM. Because each form and each Agile CRM account is different, we highly recommend that you test the integration by filling out your own form several times to ensure all the data goes to the place you want it.